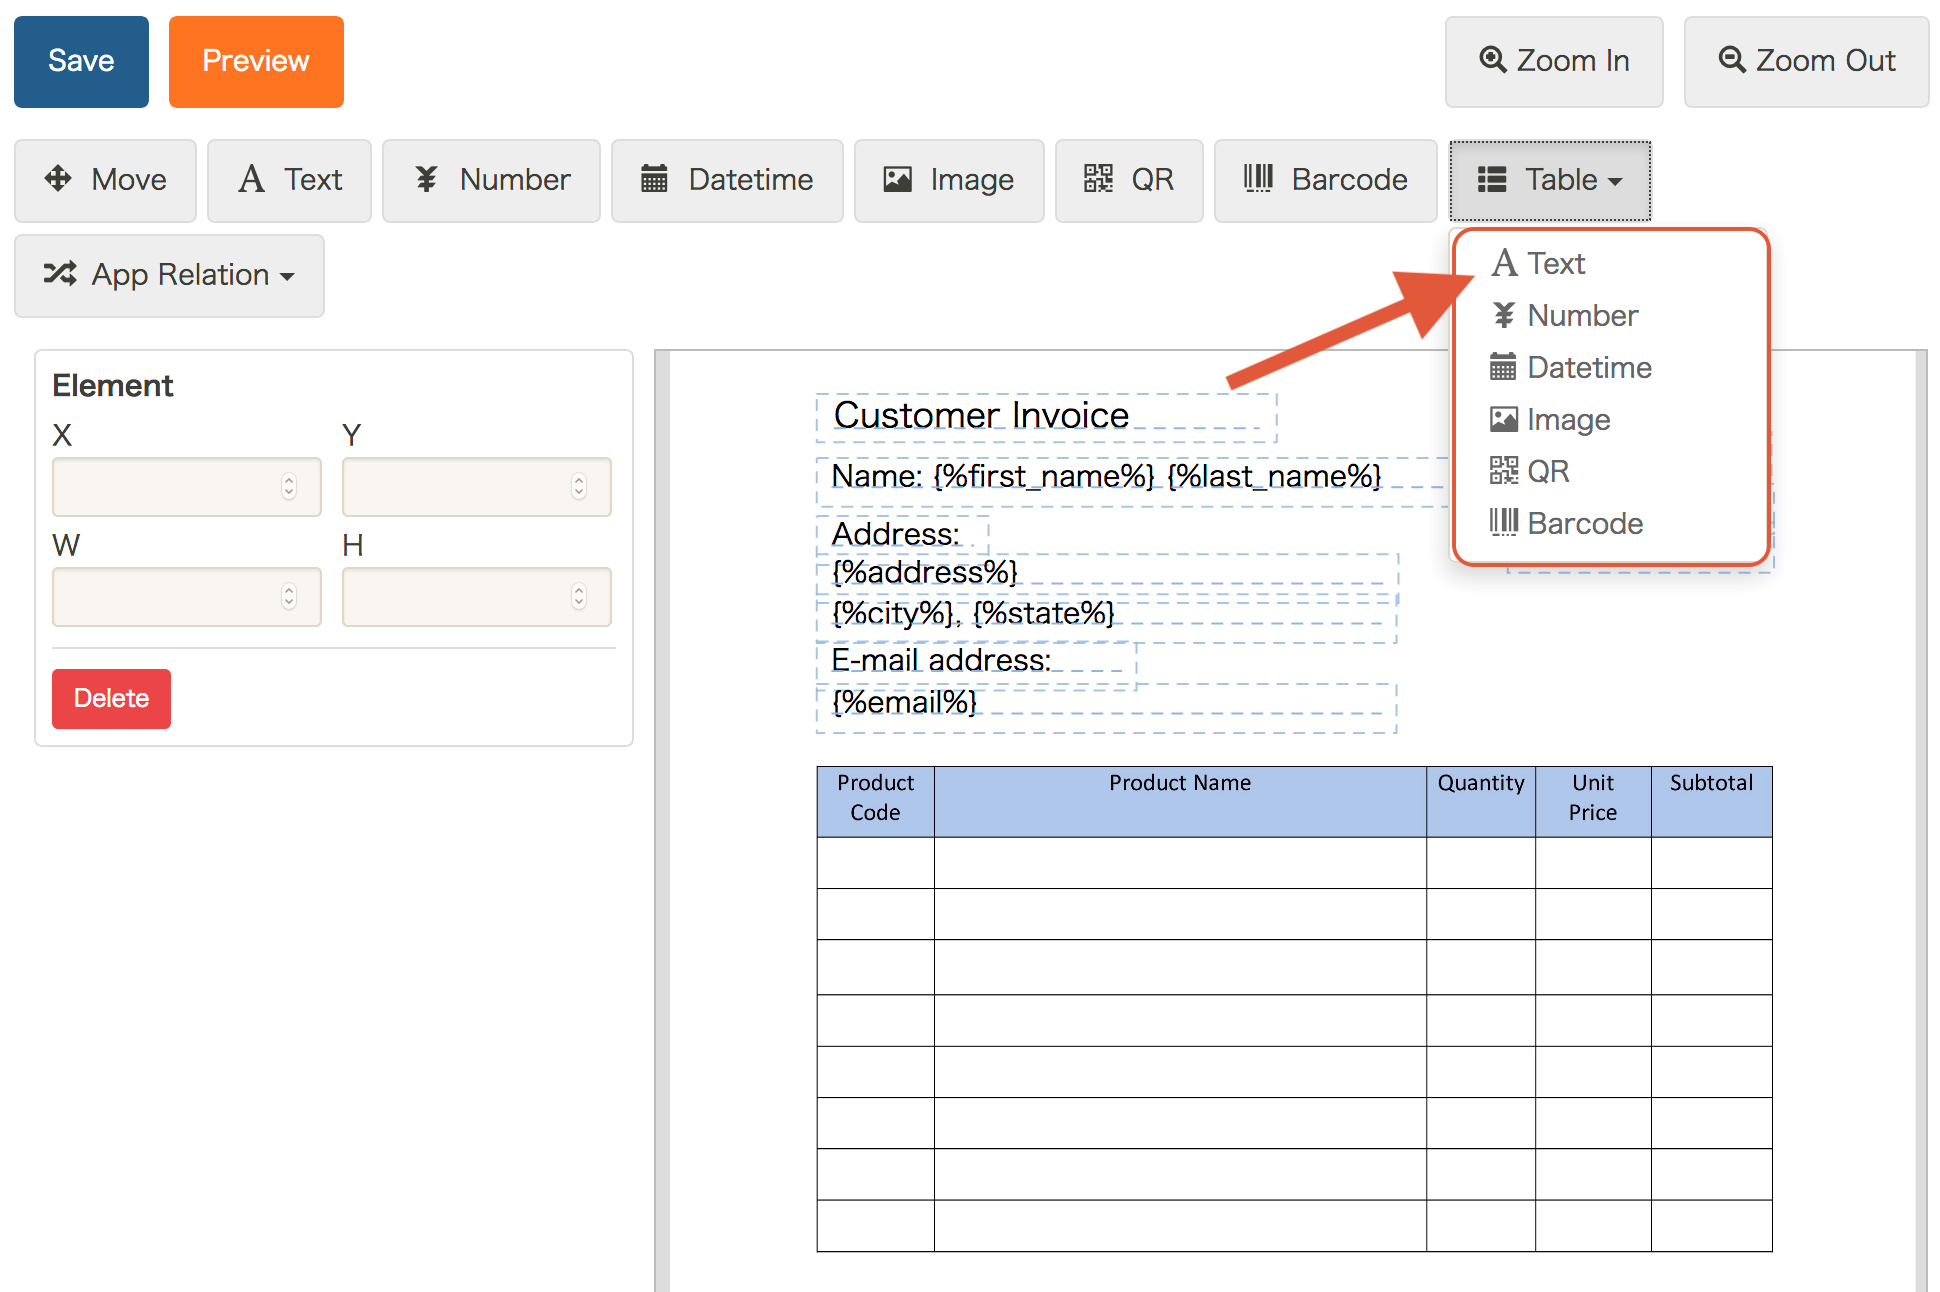
From the edit sheet layout page, click the “Table” button and then the desired field type.
Map out where the desired data should be displayed. When using a background PDF, lining up the table outline with the outline of the PDF field will allow the data to
be displayed neatly, even if the table data spans more than one row. By doing this, the text will wrap at the
height and width of the created table field, not the line spacing value.
If you’re unable to set the height and width of the table field well with just the click
and drag, you can use the “Element” section on the left-hand menu to adjust the x and y alignment as well as
the width and height of the box.
If there is more than one table in the application, use the “Table” drop down menu on the
left to choose which table to use.
Choose which field to display.
If the displayed data is off from where you want it to be, use the x and y values again to
adjust the positioning.
 From the edit sheet layout page, click the “Table” button and then the desired field type.
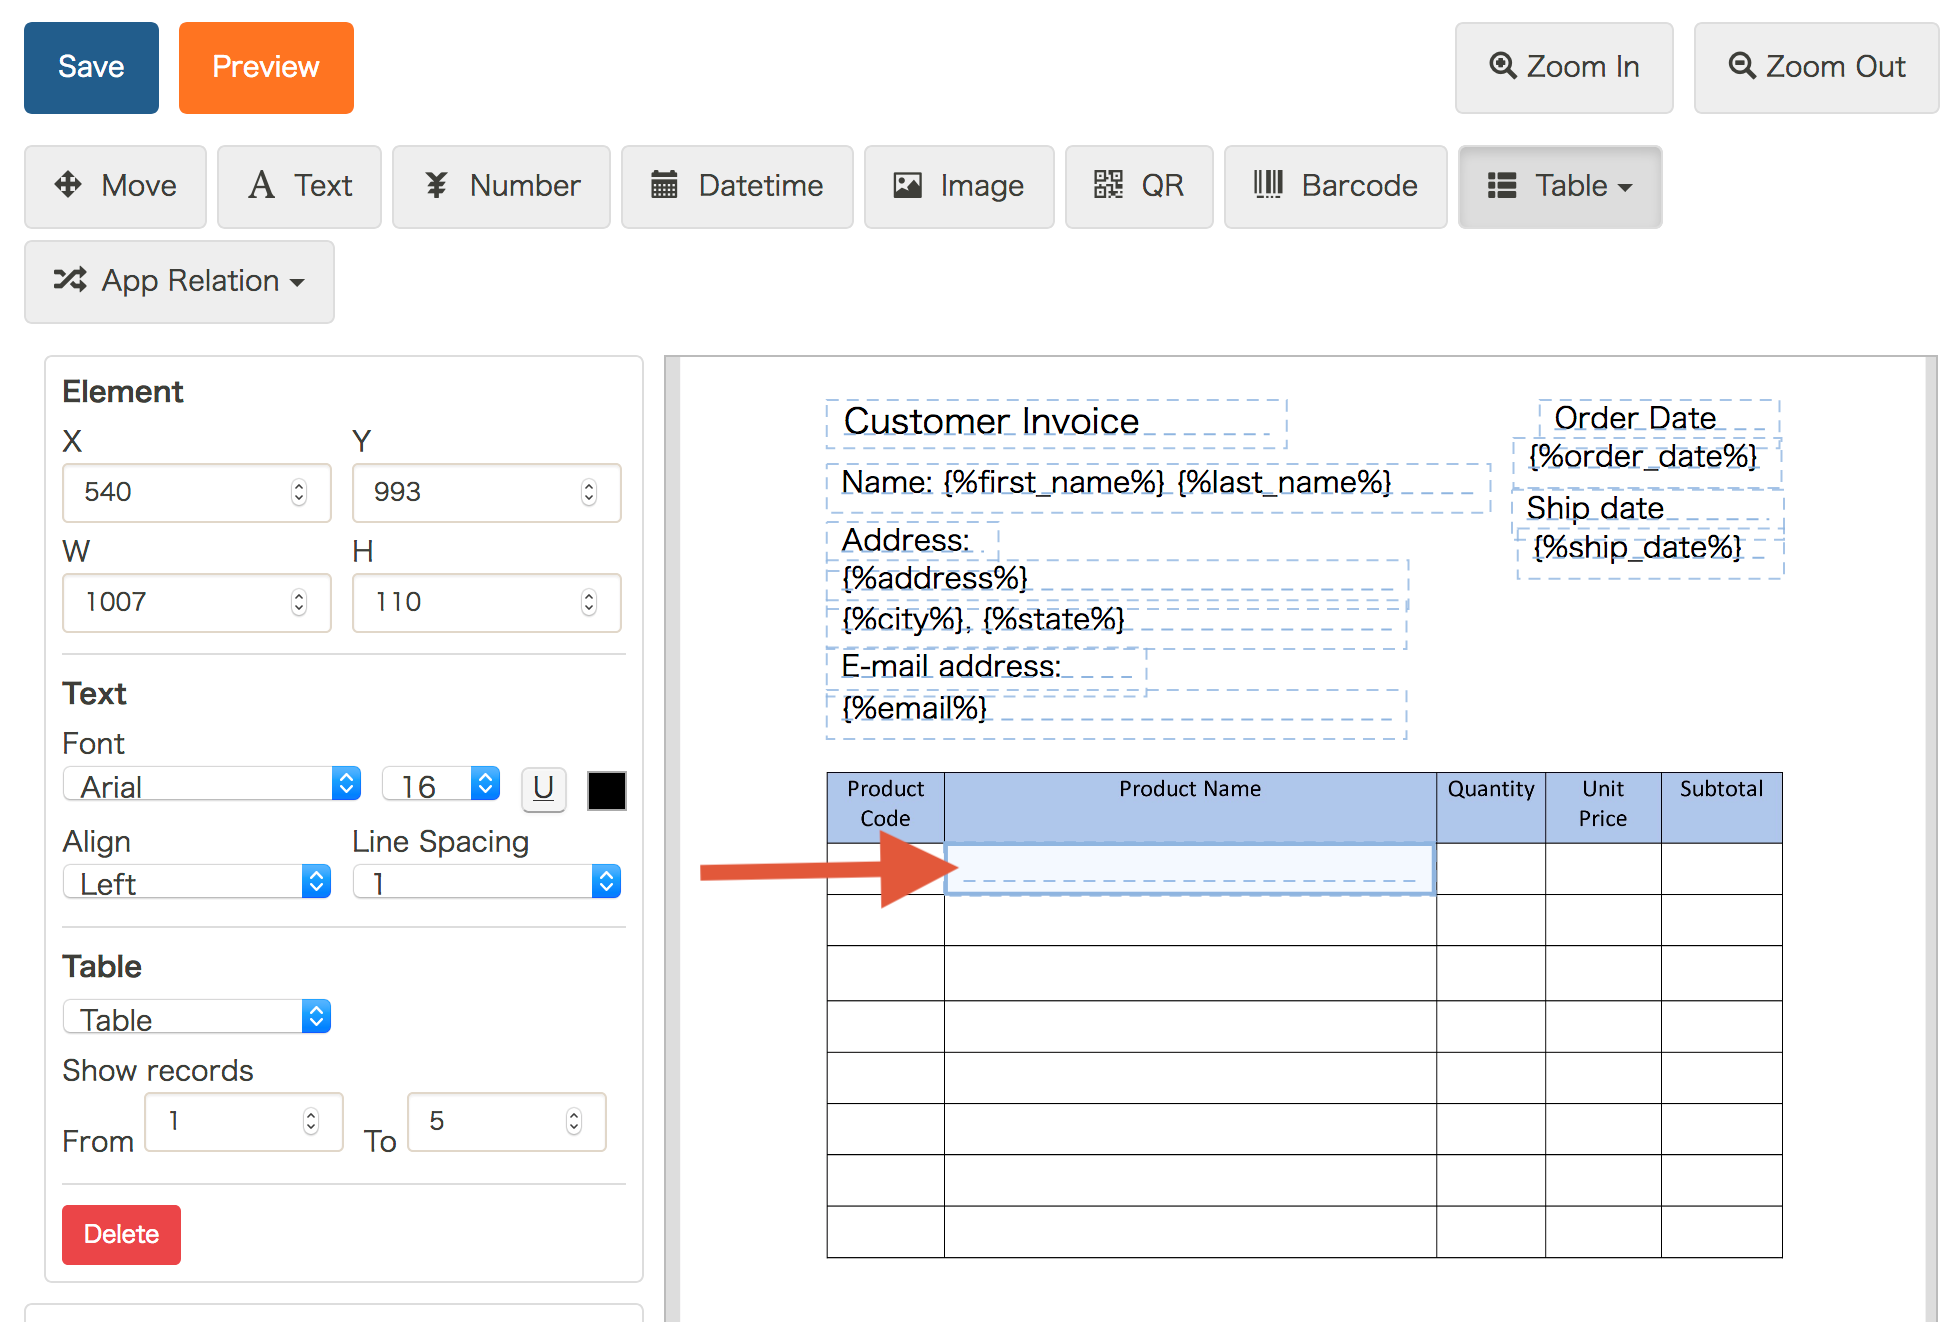 Map out where the desired data should be displayed.
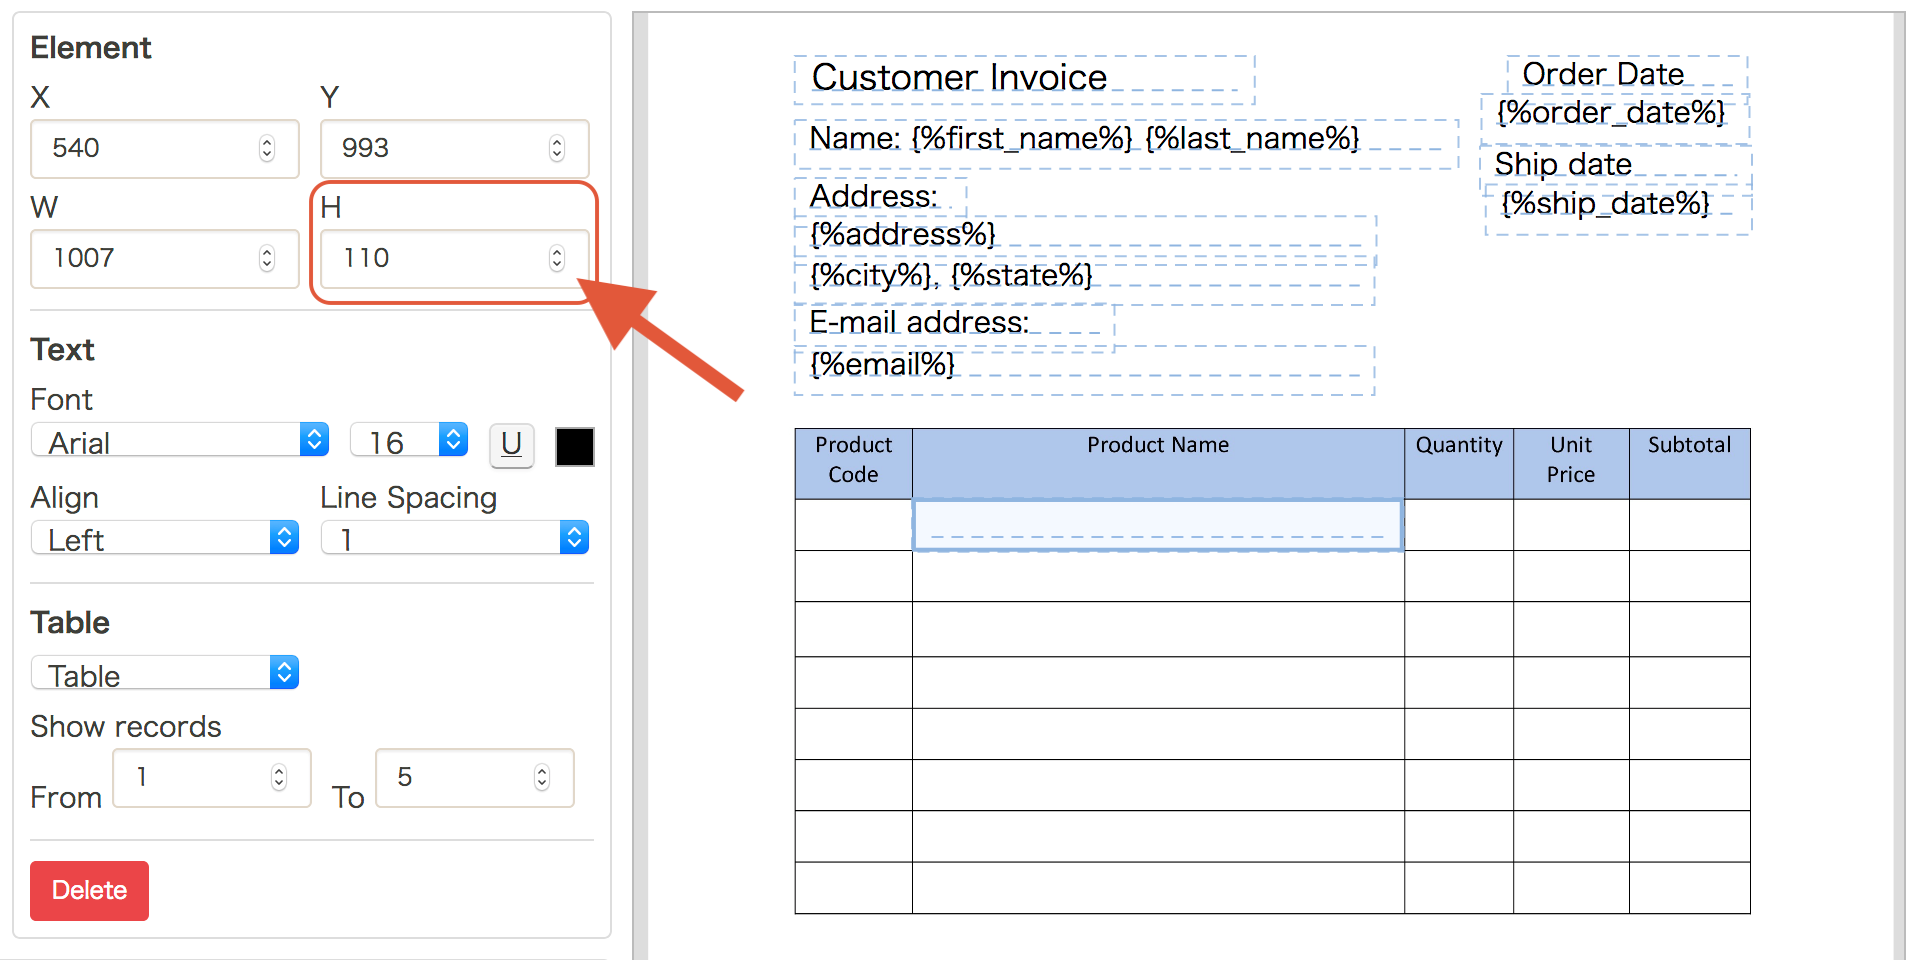 If you’re unable to set the height and width of the table field well with just the click
and drag,
If you’re unable to set the height and width of the table field well with just the click
and drag, If there is more than one table in the application, use the “Table” drop down menu on the
left to choose which table to use.
If there is more than one table in the application, use the “Table” drop down menu on the
left to choose which table to use.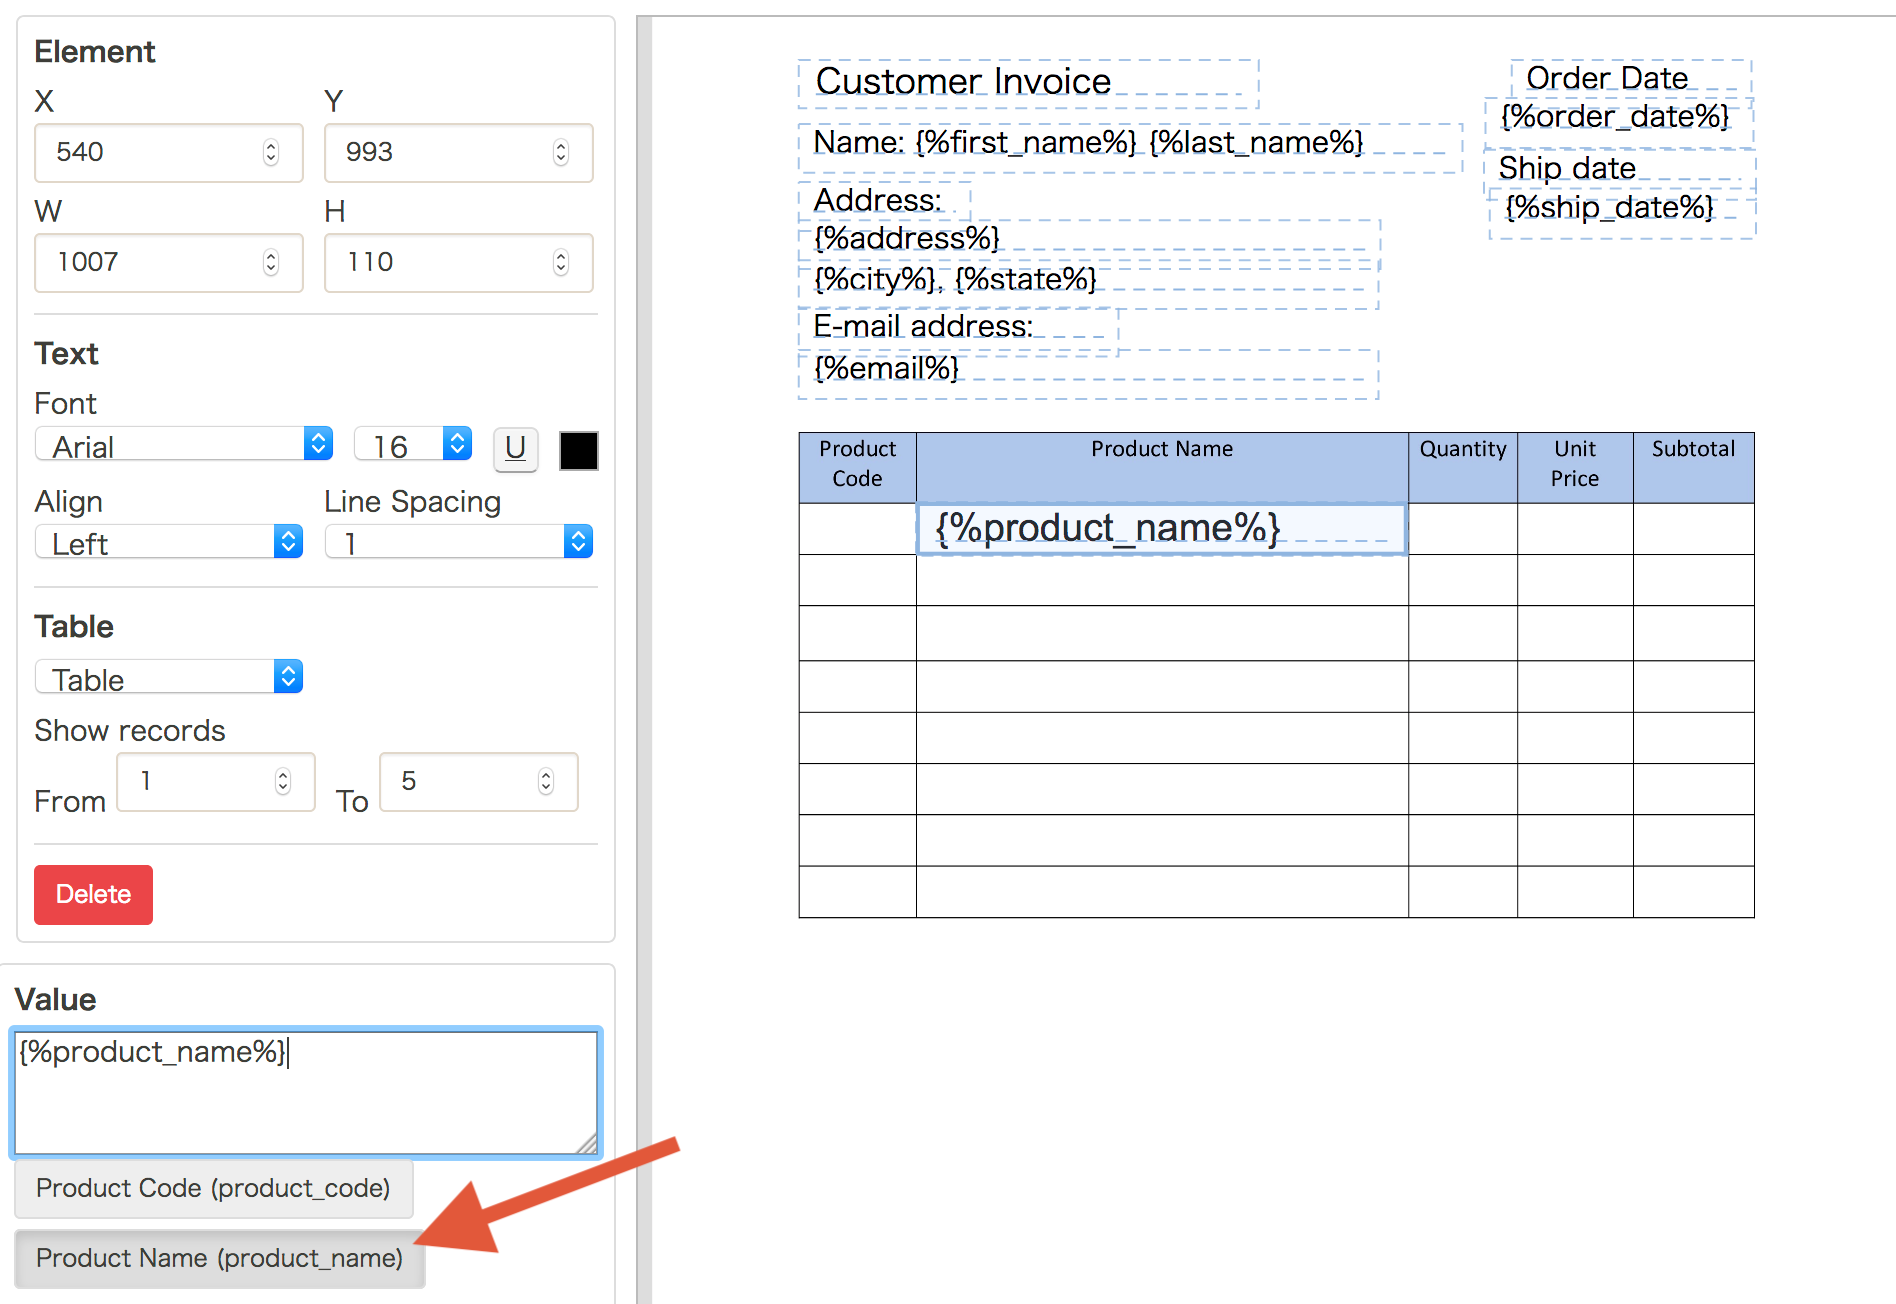 Choose which field to display.
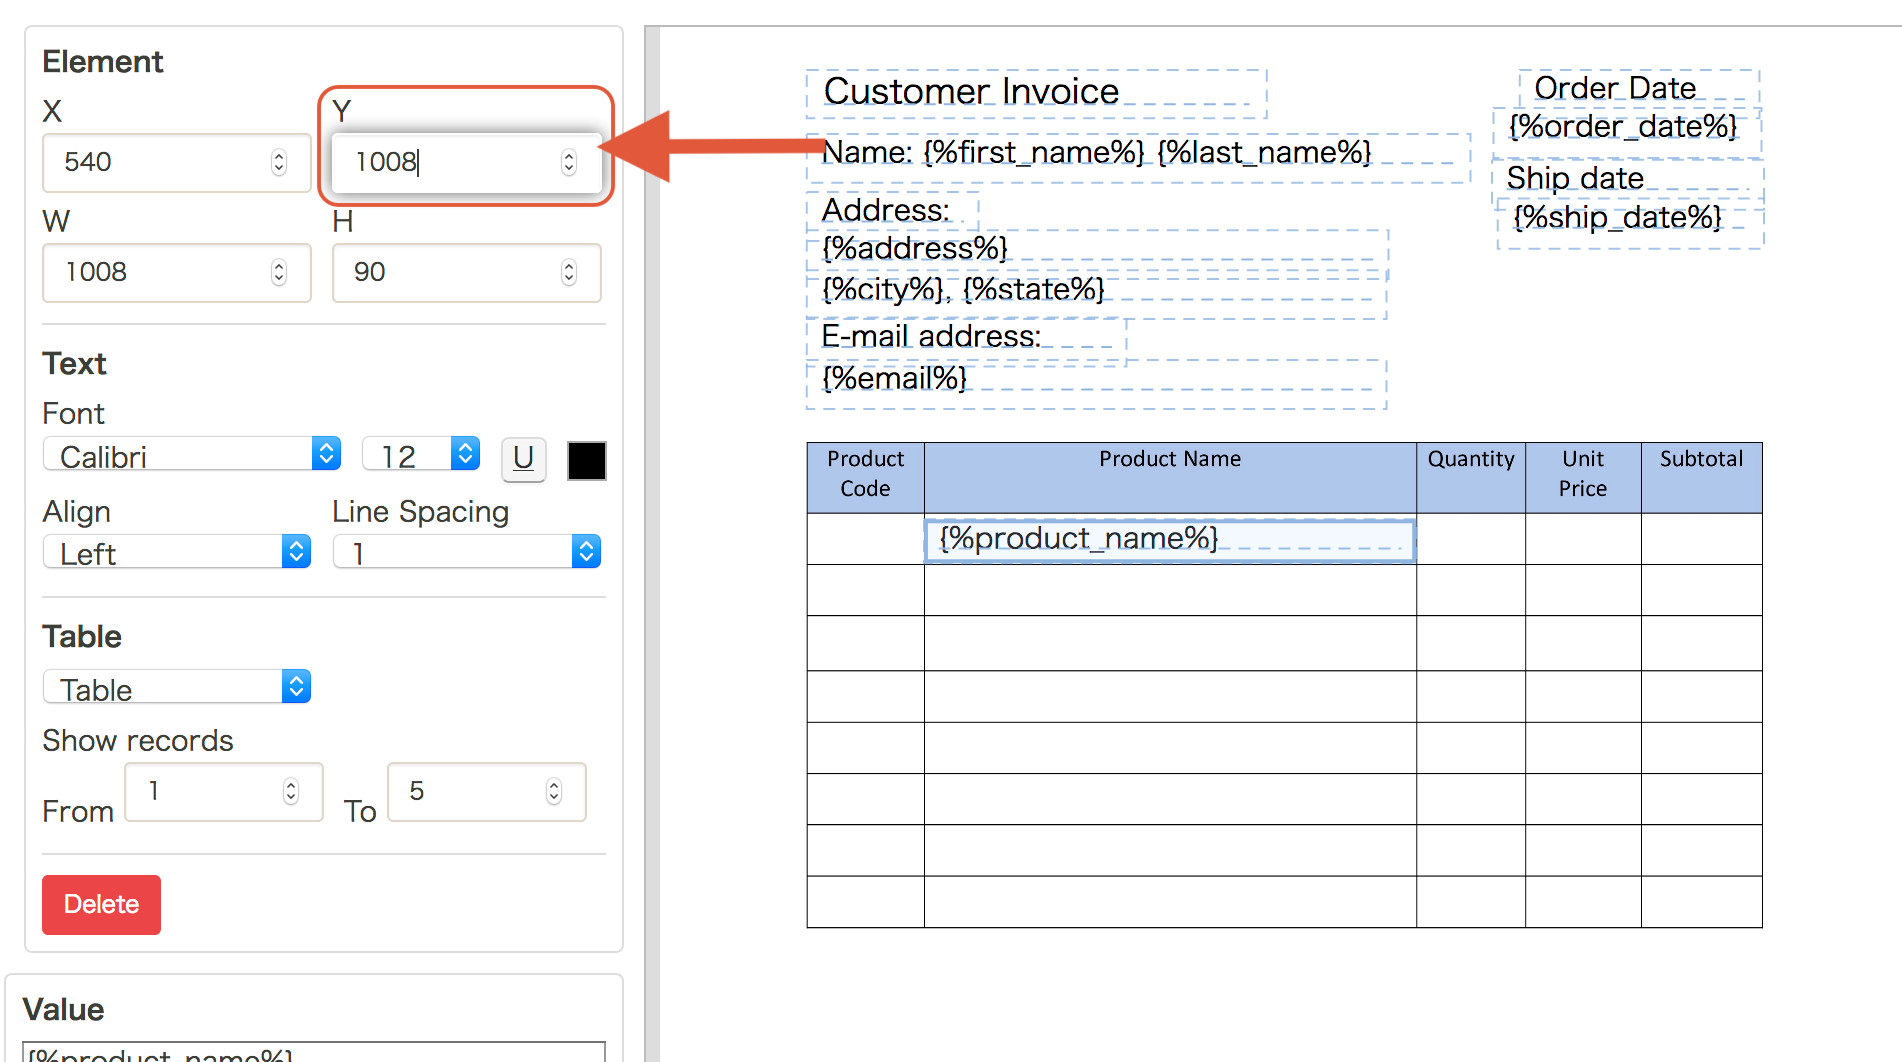 If the displayed data is off from where you want it to be, use the x and y values again to
adjust the positioning.
If the displayed data is off from where you want it to be, use the x and y values again to
adjust the positioning.